
Custom fields
What are custom fields?
Custom fields are a flexible way to set and track unique information about your volunteers that's relevant to your organisation or programs. It could also be a way to surface information front and centre.
There are 5 types of custom fields that can be set at both the organisation and program levels, providing a lot of flexibility and control.
Note: Only Essentials and Premium plans have access to custom fields. Program Coordinators cannot create or delete custom fields, but can set the volunteer information in them.
The types of custom fields
|
Single-select |
Add in any number of options and a volunteer can only be set one of the options. |
|
Date |
One date is entered for a volunteer. |
|
Number |
One number is entered for a volunteer. |
|
Multi-select |
Add in any number of options and a volunteer can have multiple options set. |
|
Tags |
Similar to multi-select, except they are displayed differently. |
|
Text |
Single-line text can be entered for a volunteer. |
Create organisation-wide custom fields
How to create custom fields for all volunteers in your organisation
- Navigate to My Volunteers
- Select the Customise button
- At the bottom of the draw that slides out from the right, select the Add a custom field... link
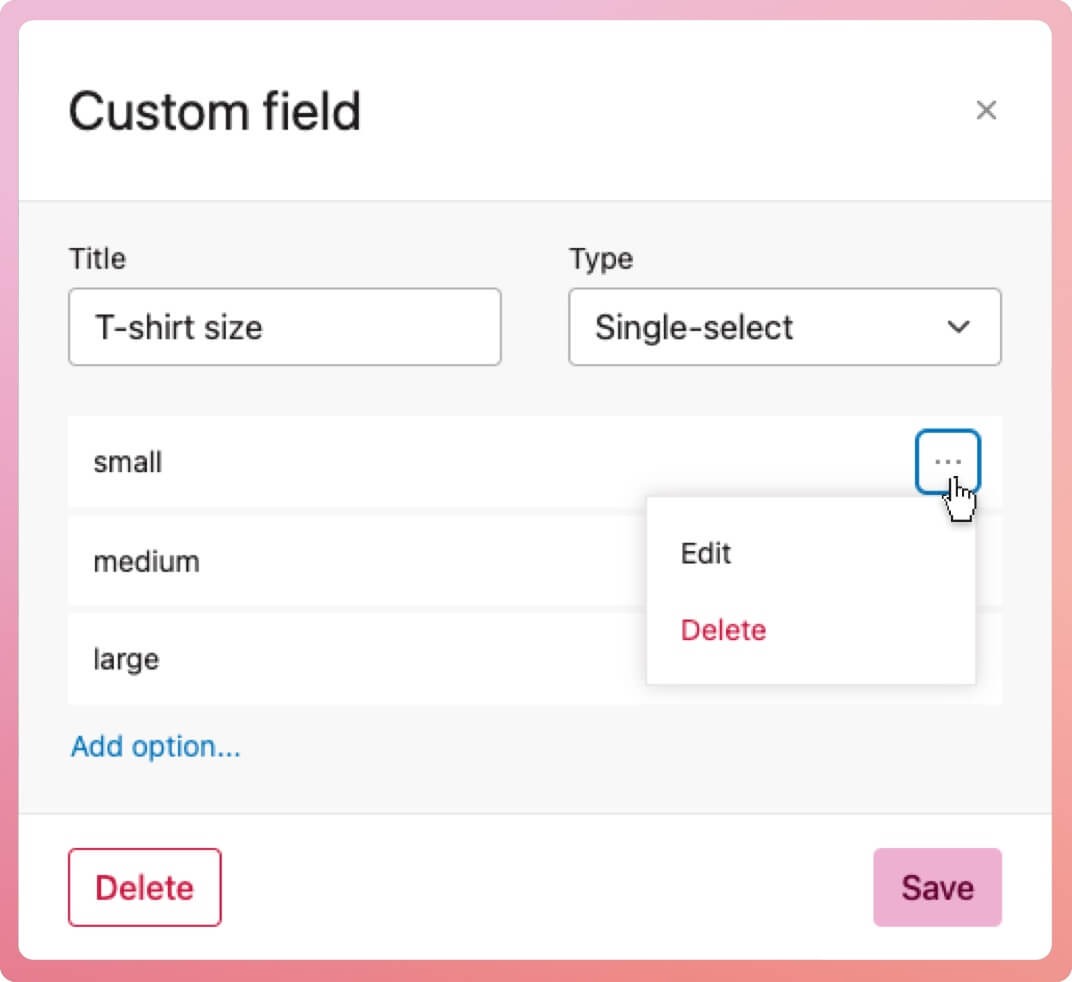
- When the custom field modal appears type in your field title and select the type
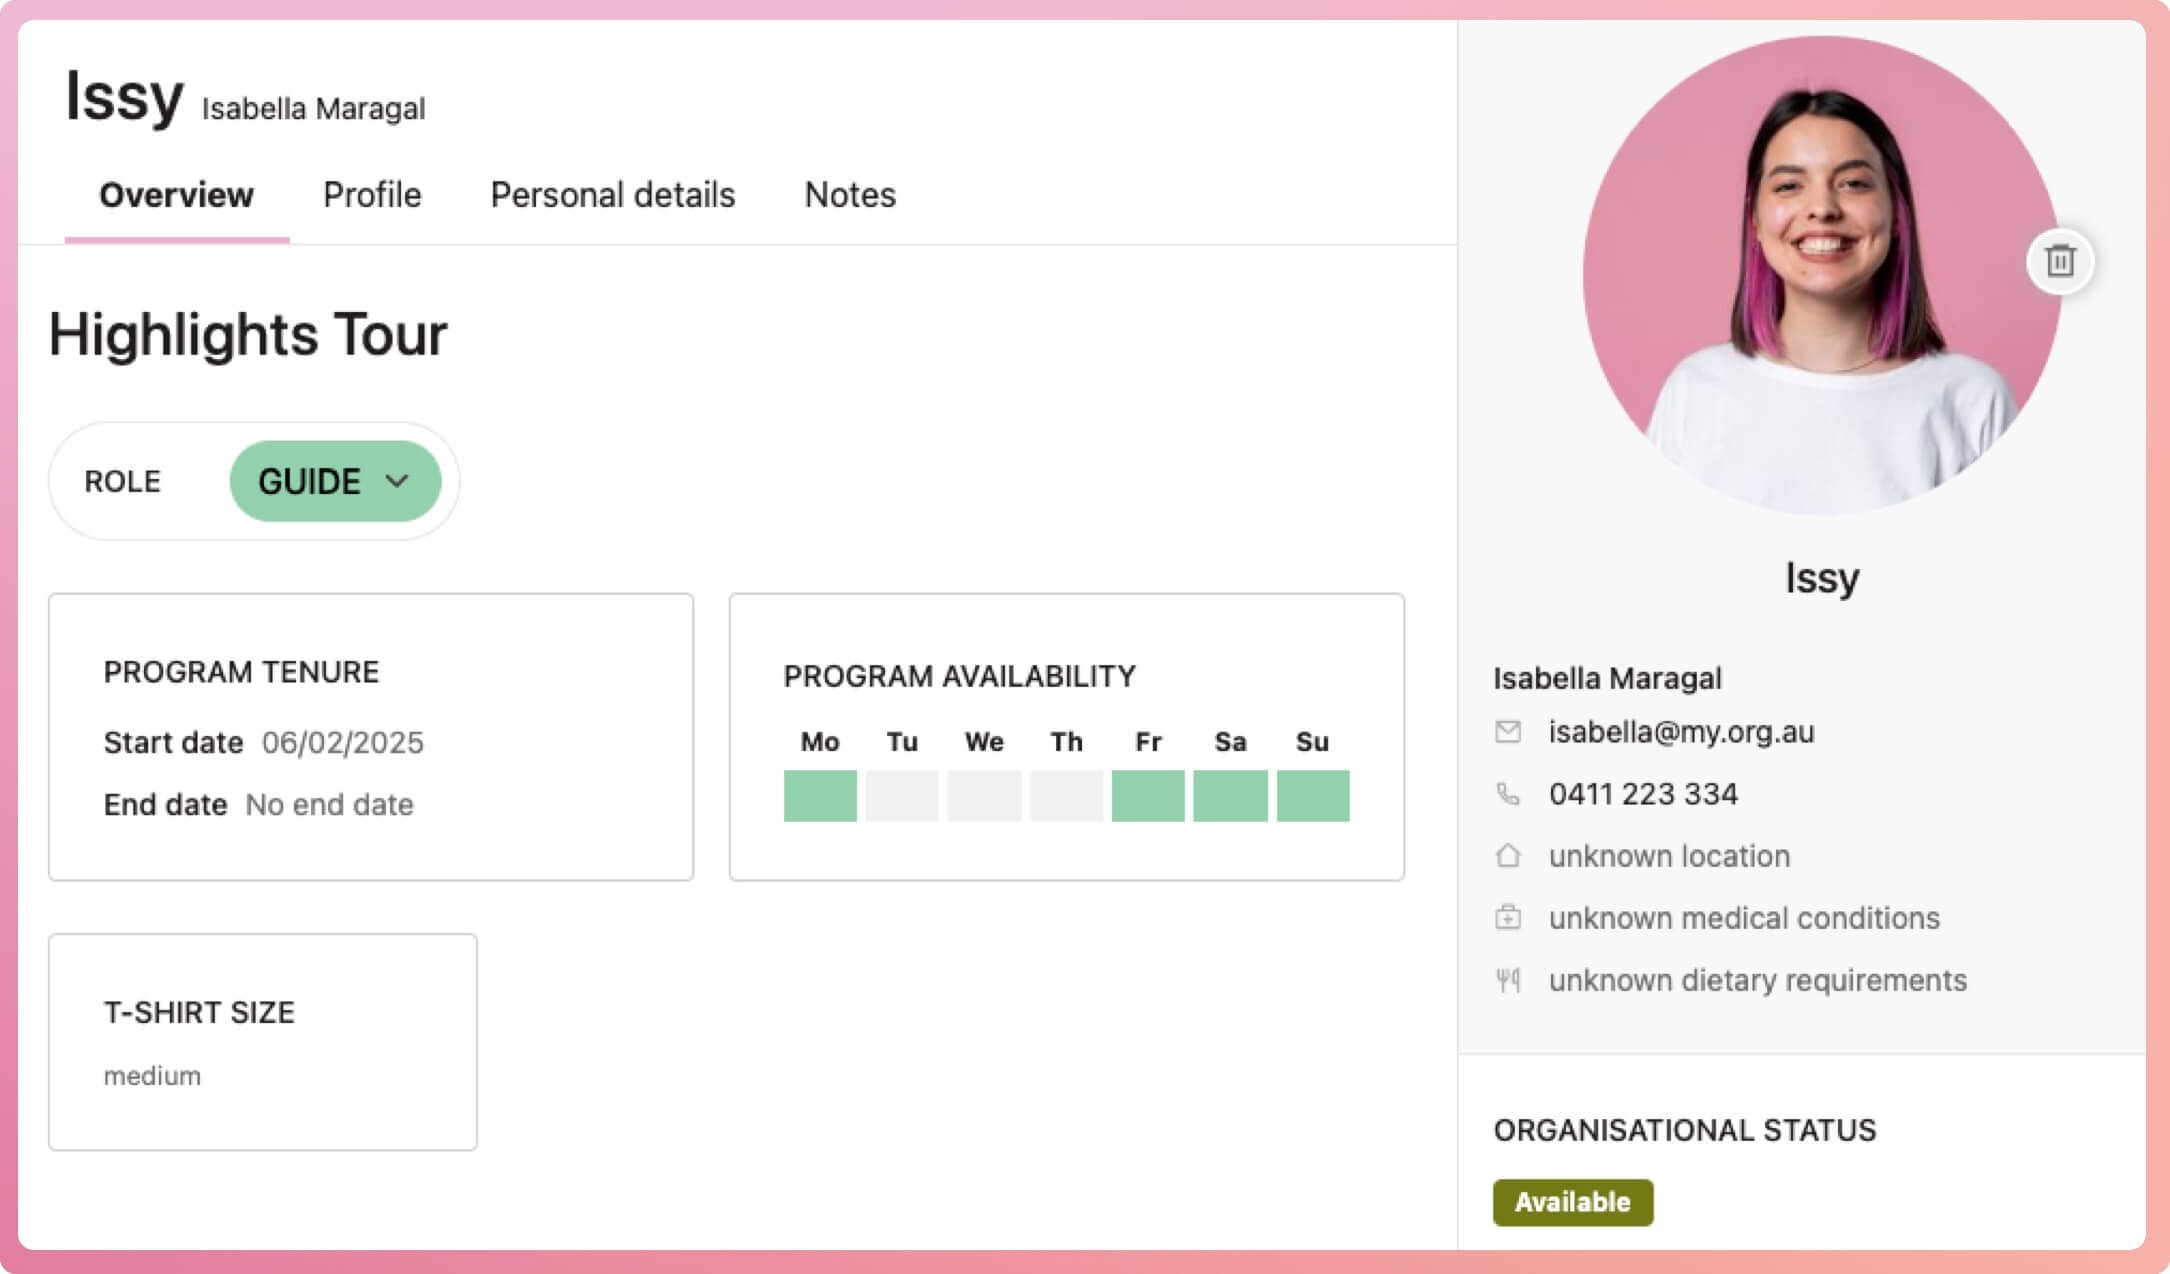
- If the type is single-select, multi-select or tag, add in the options available to set. For example: T-shirt size is a single-select and the options are small, medium and large.
- When done, select the save button at the bottom of the modal.
- The new custom field appears in the list in the draw. If the switch is left on, it will appear in the volunteer list table
Every volunteer in the organisation will have this custom field in their Overview tab.
Create program-specific custom fields
How to create custom fields for only volunteers in a certain program
- Navigate to the program and then to the volunteers tab
- Select the Customise button
- At the bottom of the draw that slides out from the right, select the Add a custom field... link
- When the custom field modal appears type in your field title and select the type
- If the type is single-select, multi-select or tag, add in the options available to set. For example: T-shirt size is a single-select and the options are small, medium and large.
- When done, select the save button at the bottom of the modal.
- The new custom field appears in the list in the draw. If the switch is left on, it will appear in the volunteer list table
Every volunteer in the program will have this custom field in their overview tab.
How to edit a custom field
- Select the Customise button
- When the slide-out appears from the right, hover over the custom field you wish to edit, and a pencil icon should appear
- Select the pencil icon to bring up the Custom field modal
- Edit as you need by adding, deleting or editing the options, changing the name or type
- Select the save button at the bottom of the modal to finalise
How to delete a custom field
- Select the Customise button
- When the slide-out appears from the right, hover over the custom field you wish to edit, and a pencil icon should appear.
- Select the pencil icon to bring up the Custom field modal
- Select the Delete button
Show/hide a custom field from the volunteer table
- Select the Customise button
- When the slide-out appears from the right, toggle the switch to show or hide the field in the volunteer table
Tip: Turning on custom fields in the volunteer list lets you quickly set them in the table view without opening each record. Learn more
How to filter by custom fields
If you need to shortlist your volunteers based on their set custom field, learn the different results you can achieve depending on the type of custom field selected.