
Onboarding checklists
Before a volunteer starts with your organisation, they may need to complete a few formalities, such as providing specific documentation, attending an information session, or obtaining access passes. INVOLVE's onboarding checklists are customisable to your organisation, so you can easily see volunteer progress and when they are ready to go.
⚙️ How to customise the onboarding checklist
- Navigate to My Organisation
- Select the Settings tab
- Find and select the Manage onboarding checklist row
- When the modal appears, you can add, edit, delete, or reorder the items.
- When you're done, select the button at the bottom of the modal. All volunteer records will be updated with the new template changes
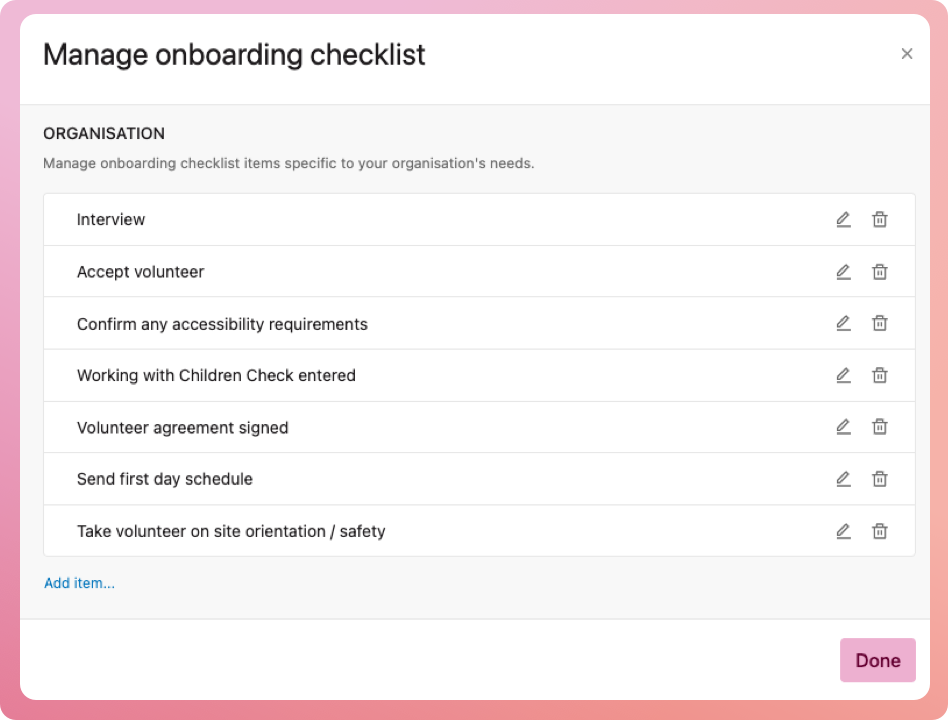
Note: if you add an item, all volunteers who were previously on 100% completeness will no longer be.
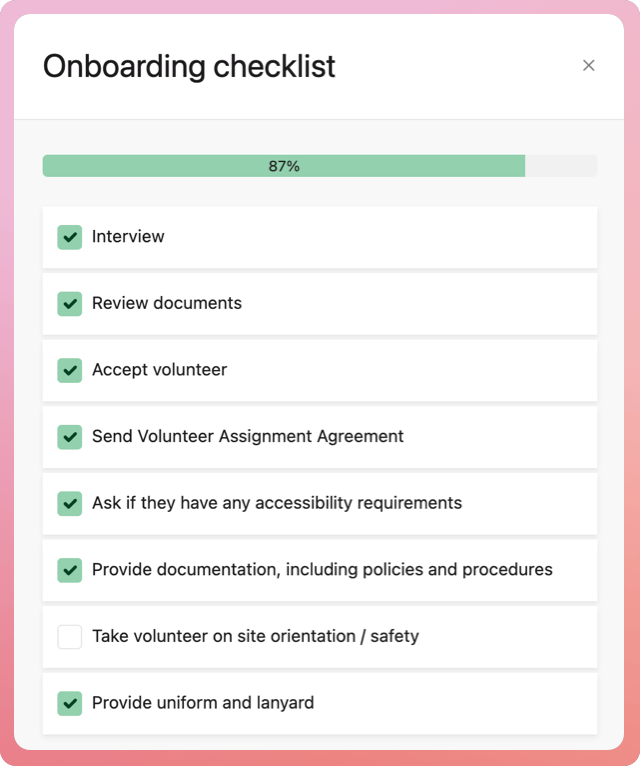
How to check items off a volunteer checklist
- Navigate to My Volunteers
- Select the volunteer to bring up their profile
- Select the checklist indicator on their Overview tab
- Check off items and select the Save button at the bottom of the modal
Do it faster: You can also bring up the checklist modal from the list of volunteers without opening the volunteer's record. Select the checklist bar in the My Volunteers list. If you cannot see it, select the Customise button and turn on the checklist switch.

Program-specific checklists
Premium users can also add an onboarding checklist per program, for example, if the program explicitly requires a Working with Children Check or further training.